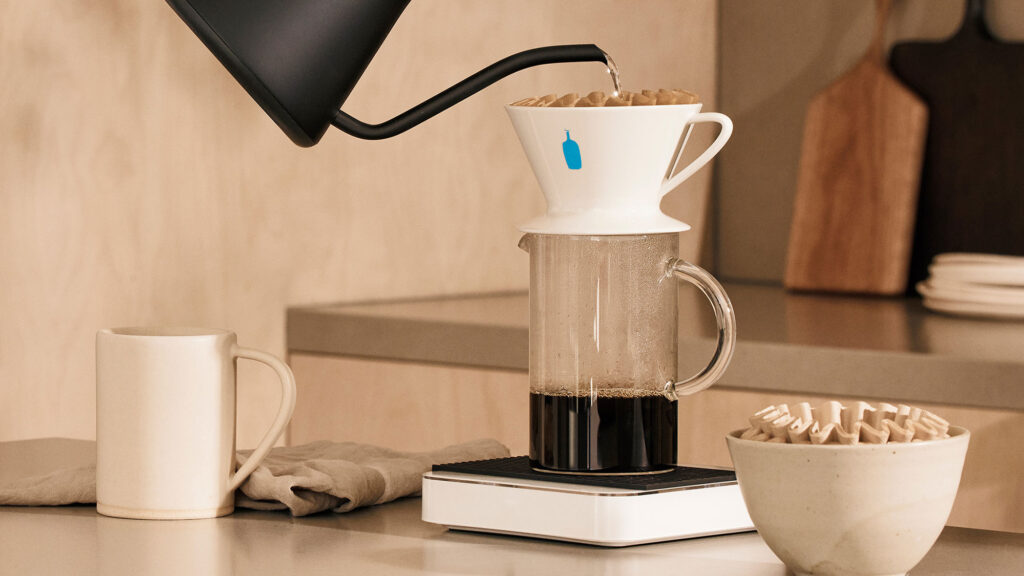
Pour-over coffee has earned a reputation as the brew of choice for those who crave precision. It’s a method that requires patience, but the payoff is a flavorful, nuanced cup of coffee that can rival any café offering. For coffee enthusiasts who enjoy controlling every element of the brewing process, mastering the pour-over method is a rewarding journey.
This guide will walk you through the basics of pour-over coffee, covering essential equipment, ideal coffee-to-water ratios, and expert techniques to achieve the perfect cup every time.
The Basics of Pour-Over Coffee
Pour-over coffee involves manually pouring hot water over coffee grounds, allowing gravity to extract the flavors gradually. Unlike automated machines, pour-over gives you total control over factors such as brewing time, water temperature, and pouring speed, resulting in a more personalized coffee experience.
The equipment needed is simple, but every tool plays an essential role in crafting your cup.
Essential Equipment for Pour-Over
- Pour-Over Dripper: The heart of this method is the pour-over dripper, typically made from ceramic, glass, or plastic. Popular choices include the Hario V60 and Chemex, both known for their simplicity and effectiveness.
- Gooseneck Kettle: Precision is key with pour-over coffee, and a gooseneck kettle gives you the control needed to pour water at the perfect pace.
- Filters: Paper filters are most commonly used with pour-over coffee makers, though some drippers work with reusable metal filters.
- Scale: A kitchen scale is crucial for measuring coffee and water accurately, ensuring consistency with every brew.
- Grinder: Freshly ground coffee makes a significant difference in flavor. Invest in a burr grinder to grind your coffee beans to the ideal size—medium-fine for most pour-over methods.
The Perfect Coffee-to-Water Ratio
For the best results, start with a coffee-to-water ratio of 1:15 or 1:16. This means for every gram of coffee, you’ll need 15-16 grams of water. For a standard cup of pour-over coffee, 15 grams of coffee and 240 grams (or milliliters) of water is a good place to begin.
To dial in your perfect brew, you can adjust this ratio slightly based on your taste preferences. Want a bolder cup? Try a 1:14 ratio. Prefer a lighter, more delicate flavor? Adjust to 1:17.
Step-by-Step Guide to Perfect Pour-Over Coffee
Now that you have your equipment and coffee-to-water ratio ready, it’s time to brew.
1. Prepare the Filter and Equipment
Place the paper filter in your dripper and rinse it with hot water. This removes any paper residue and preheats your dripper. After rinsing, discard the water from your carafe or mug.
Set up your dripper on top of the carafe or mug and weigh out your coffee grounds using a kitchen scale.
2. Grind Your Coffee
Grind your coffee to a medium-fine consistency, similar to table salt. The grind size plays a big role in extraction—too fine, and your coffee might taste bitter; too coarse, and it could be under-extracted and weak.
3. Heat the Water
Heat your water to about 200°F (93°C), just below boiling point. If you don’t have a thermometer, simply bring the water to a boil and let it sit for about 30 seconds before pouring.
4. Bloom the Coffee
Start by pouring just enough hot water over the grounds to saturate them, allowing the coffee to “bloom.” This initial pour releases carbon dioxide, which can affect the flavor if not allowed to escape. Let the coffee bloom for 30-45 seconds before continuing.
5. Pour in a Circular Motion
Slowly pour the remaining water over the coffee grounds in a spiral motion, starting from the center and moving outward. Pour in controlled stages, pausing to let the water drain slightly between pours. Aim for a total brewing time of 3-4 minutes.
Using a Nespresso machine for your quick coffee fixes is a great alternative, but nothing compares to the satisfaction of mastering the art of pour-over brewing. That said, Nespresso’s specialty pods can come close to providing that deep flavor profile on busy days when pour-over just isn’t practical.
6. Serve and Enjoy
Once the water has fully drained through the coffee grounds, remove the dripper, discard the filter, and give the coffee a gentle swirl to mix the layers. Pour the coffee into your mug, and enjoy the fruits of your labor.
Troubleshooting Common Pour-Over Problems
Achieving the perfect pour-over brew can take a little practice, but it’s all part of the journey. If you encounter any hiccups along the way, here are some common issues and how to fix them.
Problem: Bitter Coffee
- Solution: Your coffee may be over-extracted, meaning the grind size is too fine, or you poured the water too slowly. Try coarsening the grind and reducing your pour time.
Problem: Sour Coffee
- Solution: Sourness indicates under-extraction. In this case, the water isn’t spending enough time with the coffee grounds. Slow down your pour and try using a finer grind.
Problem: Coffee is Too Weak
- Solution: A weak cup of coffee could be due to using too little coffee or too much water. Adjust your coffee-to-water ratio for a stronger brew, or try increasing the coffee grind size slightly.


